js-sdk
按照企业微信官方给的做法来链接是https://qydev.weixin.qq.com/wiki/index.php?title=%E5%BE%AE%E4%BF%A1JS%E6%8E%A5%E5%8F%A3#.E6.AD.A5.E9.AA.A4.E4.B8.80.EF.BC.9A.E5.BC.95.E5.85.A5JS.E6.96.87.E4.BB.B6.
(1)引入JS文件,在需要调用JS接口的页面引入如下JS文件,(支持https),链接: http://res.wx.qq.com/open/js/jweixin-1.0.0.js.
(2)通过config接口注入权限验证配置。
wx.config({
debug: true, // 开启调试模式,调用的所有api的返回值会在客户端alert出来,若要查看传入的参数,可以在pc端打开,参数信息会通过log打出,仅在pc端时才会打印。
appId: ”, // 必填,企业号的唯一标识,此处填写企业号corpid
timestamp: , // 必填,生成签名的时间戳
nonceStr: ”, // 必填,生成签名的随机串
signature: ”,// 必填,签名,见附录1
jsApiList: [] // 必填,需要使用的JS接口列表,所有JS接口列表见附录2
});
这一步,我看到很多很多说signature不正确的报错:invalid signature
这边着重介绍一下。以使用qrCode(扫描二维码为例),来给大家演示一下,正确的signature是怎么生成的。
细心的话,应该看到我在手把手教你springboot企业微信开发(二)当中写到申请域名校验的吧?

我把本地域名也放在这里了哦!有疑问的话回到手把手教你springboot企业微信开发(二) 按照里面说的方法配置 工作台应用主页、网页授权及JS-SDK、企业微信授权登录【Web网页】。
这里,配置完务必看一下:
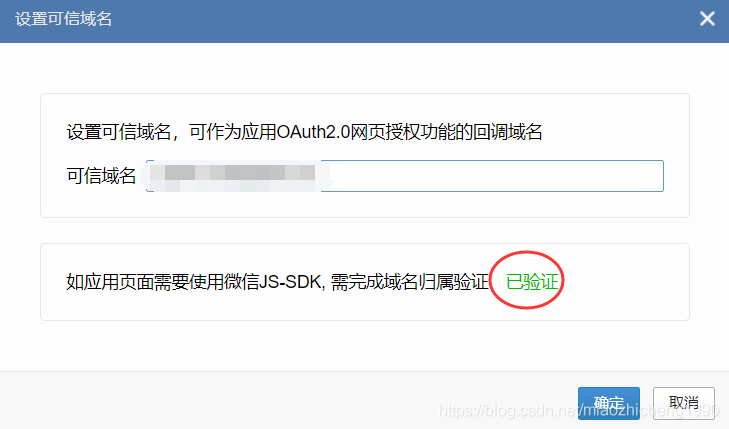
校验一定是已验证。
然后,在我们的html页面上,引入:
<script src="https://res.wx.qq.com/open/js/jweixin-1.4.0.js"></script>写js代码:
var thisUrl = window.location.href.split(‘#’)[0];;
$(function() {
alert(window.location.href.split(‘#’)[0]);
$.ajax({
type: “get”,
url: “./config?index=” + 0 + “&thisUrl=” + thisUrl,
cache: false,
async: false,
dataType: “json”,
success: function(data) {
//alert(data.config.appId);
console.log(data);
appId = data.config.appId;
timestamp = data.config.timestamp;
nonceStr = data.config.nonceStr;
signature = data.config.signature;
console.log(signature);
wx.config({
// 开启调试模式,调用的所有api的返回值会在客户端alert出来,若要查看传入的参数,可以在pc端打开,参数信息会通过log打出,仅在pc端时才会打印。
debug: false,
// 必填,公众号的唯一标识
appId: appId,
// 必填,生成签名的时间戳
timestamp:timestamp,
// 必填,生成签名的随机串
nonceStr:nonceStr,
// 必填,签名,见附录1
signature:signature,
// 必填,需要使用的JS接口列表,所有JS接口列表见附录2
jsApiList : [ ‘checkJsApi’, ‘scanQRCode’ ]
});
}
});
wx.error(function(res) {
alert(“出错了:” + res.errMsg);//这个地方的好处就是wx.config配置错误,会弹出窗口哪里错误,然后根据微信文档查询即可。
});
wx.ready(function() {
wx.checkJsApi({
jsApiList : [‘scanQRCode’],
success : function(res) {
//alert(“成功了:” +res);
}
});
//点击按钮扫描二维码
document.querySelector(‘#qrReport’).onclick = function() {
alert(“qingqiu”);
wx.scanQRCode({
needResult: 1, // 默认为0,扫描结果由微信处理,1则直接返回扫描结果,
scanType: [“qrCode”,”barCode”],
success: function (res) {
var result = res.resultStr;
console.log(res)
alert(result)
}
});
};
});
一定注意这个thisUrl多少英雄好汉在这里翻车啊!因为thisUrl是很多签名invalid signature的原因。我这边有个奇技淫巧,帮助大家解决这个要人命的问题。
在alert(window.location.href.split(‘#’)[0]);假如你遇到invalid signature很多人会说是检查参数,我的经验是,十有八九在这里出问题。
在weixin-java-cp-demo-master后台加代码:
/**
* 获取配置信息
*
* @param url
* @param user
* @param index
* @return
*/
@ResponseBody
@GetMapping(“config”)
public Map wxconfig( @RequestParam(value=”index”) int index, @RequestParam(value=”thisUrl”) String thisUrl, ServletRequest request) {
Map map = new HashMap();
HttpServletRequest servletRequest = ((HttpServletRequest) request);
int agentId = wxCpProperties.getAppConfigs().get(index).getAgentId();
final WxCpService wxCpService = WxCpConfiguration.getCpService(agentId);
String url = thisUrl + “&state=STATE”;
WxJsapiSignature jsapiSignature = new WxJsapiSignature();
try {
String token = wxCpService.getAccessToken();
String responseContent = HttpRequest.sendGet(“https://qyapi.weixin.qq.com/cgi-bin/get_jsapi_ticket?access_token=” + token, null);
JsonObject tmpJsonObject = new JsonParser().parse(responseContent).getAsJsonObject();
long timestamp = System.currentTimeMillis() / 1000;
String noncestr = RandomUtils.getRandomStr();
String jsapiTicket = tmpJsonObject.get(“ticket”).getAsString();
String signature = SHA1.genWithAmple(
“jsapi_ticket=” + jsapiTicket +
“&noncestr=” + noncestr +
“×tamp=” + timestamp +
“&url=” + url
);
jsapiSignature.setTimestamp(timestamp);
jsapiSignature.setNonceStr(noncestr);
jsapiSignature.setUrl(url);
jsapiSignature.setSignature(signature);
jsapiSignature.setAppId(wxCpProperties.getCorpId());
map.put(“code”, “0”);
map.put(“config”, jsapiSignature);
} catch (WxErrorException e) {
System.out.println(“\n———————————> 报错cause: ” + e.getCause());
System.out.println(“\n———————————> 报错message: ” + e.getMessage());
map.put(“code”, “600”);
map.put(“mgs”, “内部错误,请联系管理员。”);
return map;
}
return map;
}
在int agentId = wxCpProperties.getAppConfigs().get(index).getAgentId();加断点,debug重启WxCpDemoApplication.java,然后在企业微信中,打开应用,来仔细看:
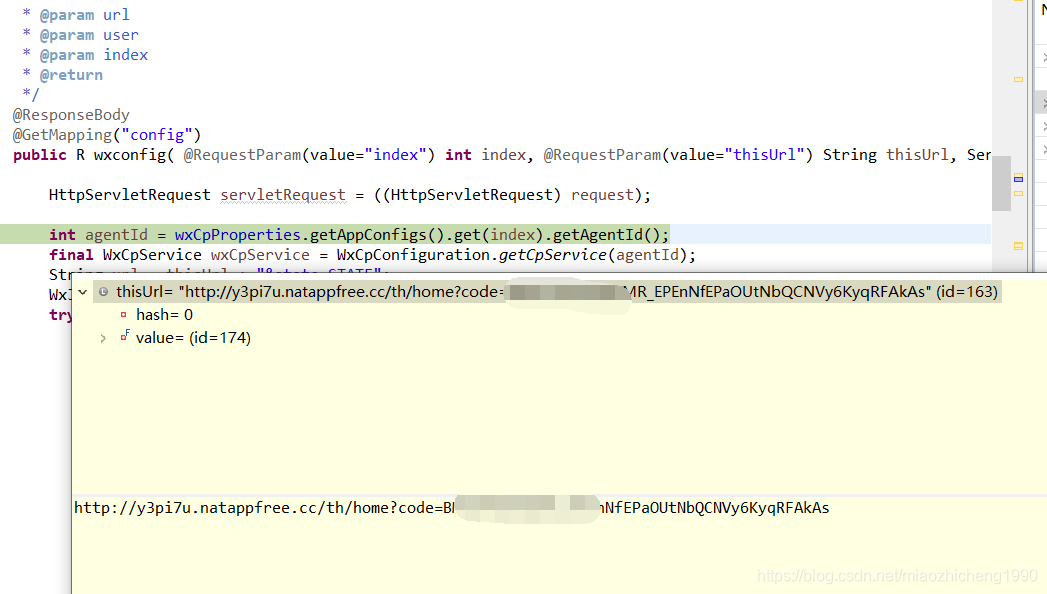
thisUrl的值后面只有一个参数,code对吧?
看alert中:

多了个state,我为了演示,在java代码中:String url = thisUrl + "&state=STATE";
就是这个逻辑!html页面里的地址,一定要和生成签名的url一致!!!
至于生成sha签名,模仿这个来吧
String signature = SHA1.genWithAmple(
“jsapi_ticket=” + jsapiTicket +
“&noncestr=” + noncestr +
“×tamp=” + timestamp +
“&url=” + url
);
如果没用weixin-java-cp的jar包,我这边抄了别人,自己也试了一下,这个也是可以的,给大家拿去参考参考:
import java.security.MessageDigest;
public class ShaUtils {
public static String getSha1(String str) {
char hexDigits[] = { ‘0’, ‘1’, ‘2’, ‘3’, ‘4’, ‘5’, ‘6’, ‘7’, ‘8’, ‘9’, ‘a’, ‘b’, ‘c’, ‘d’, ‘e’, ‘f’ };
try {
MessageDigest mdTemp = MessageDigest.getInstance(“SHA1”);
mdTemp.update(str.getBytes(“UTF-8”));
byte[] md = mdTemp.digest();
int j = md.length;
char buf[] = new char[j * 2];
int k = 0;
for (int i = 0; i < j; i++) {
byte byte0 = md[i];
buf[k++] = hexDigits[byte0 >>> 4 & 0xf];
buf[k++] = hexDigits[byte0 & 0xf];
}
return new String(buf);
} catch (Exception e) {
return null;
}
}
}
对于报错:invalid signature的,不妨按照我说的方法试一试,如果还是解决不了,给我留言。
最后,附上我这边已经成功调用扫描二维码的图片:
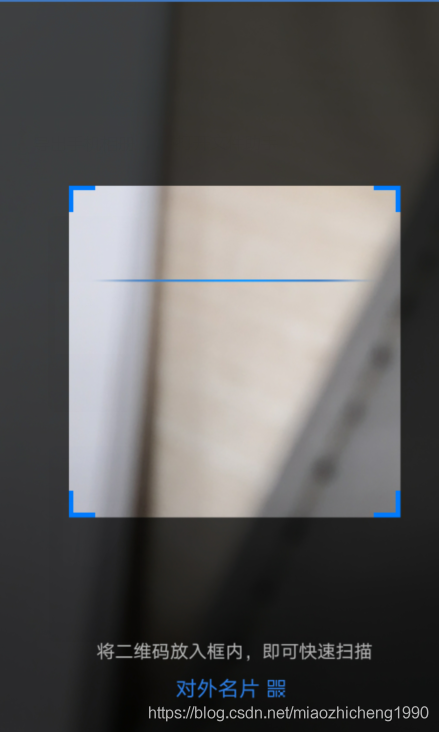
更多的js-sdk功能,都按照这么来。
结语
总结一下,springboot里开发微信企业号有好处,好处是看到springboot就会想到微服务,这使得很多东西就有了发挥的余地了,大家自己摸索。springboot本身集成了tomcat等等,在开发的过程中少了很多配置。用springboot想要灵活的配置,打成jar灵活度也是非常可以的。
因为使用了springboot自带的tomcat,配置静态资源的时候留意一下,要不然没法访问到txt文件,那就没法穿透内外网了。
在遇到invalid signature错误的时候,对初学者打击很大的,你爱她又恨她,她始终不给你正面的回复,一直报错,又不想放弃,像极了追女生对吧?加油,对java的执着就像追女生一样,是debug无数次,只求一个人,然后就对她好一辈子。如果遇到不好解决的困难,给我留言,大家一起讨论。注意,是java之类的问题,不是感情问题。开个玩笑,哈哈哈哈。
到这里,微信企业号开发的内容已经完结了。我总结的东西的话就是这几篇博客,写的不好,希望大家指正。散花~~~
————————————————
版权声明:本文为CSDN博主「天赐我爱」的原创文章,遵循CC 4.0 BY-SA版权协议,转载请附上原文出处链接及本声明。
原文链接:https://blog.csdn.net/miaozhicheng1990/article/details/106257614