
Redisson是架设在redis基础上的一个Java驻内存数据网格(In-Memory Data Grid)。充分的利用了Redis键值数据库提供的一系列优势,基于Java实用工具包中常用接口,为使用者提供了一系列具有分布式特性的常用工具类。使得原本作为协调单机多线程并发程序的工具包获得了协调分布式多机多线程并发系统的能力,大大降低了设计和研发大规模分布式系统的难度。同时结合各富特色的分布式服务,更进一步简化了分布式环境中程序相互之间的协作。
Github地址:https://github.com/redisson/redisson
一、添加依赖
<dependencies>
      <dependency>
          <groupId>org.springframework.boot</groupId>
          <artifactId>spring-boot-starter-web</artifactId>
      </dependency>

      <!-- springboot整合redis -->
      <dependency>
          <groupId>org.springframework.boot</groupId>
          <artifactId>spring-boot-starter-data-redis</artifactId>
      </dependency>

      <!-- springboot整合redisson -->
      <dependency>
          <groupId>org.redisson</groupId>
          <artifactId>redisson-spring-boot-starter</artifactId>
          <version>3.13.6</version>
      </dependency>
  </dependencies>
二、redis配置文件
server:
port: 8000

spring:
redis:
  host: localhost
  port: 6379
  password: null
  database: 1
  timeout: 30000
三、新建配置类
@Configuration
public class MyRedissonConfig {

  @Value("${spring.redis.host}")
  String redisHost;

  @Value("${spring.redis.port}")
  String redisPort;

  @Value("${spring.redis.password}")
  String redisPassword;

  @Value("${spring.redis.timeout}")
  Integer redisTimeout;

  /**
   * Redisson配置
   * @return
   */
  @Bean
  RedissonClient redissonClient() {
    //1、创建配置
      Config config = new Config();

      redisHost = redisHost.startsWith("redis://") ? redisHost : "redis://" + redisHost;
      SingleServerConfig serverConfig = config.useSingleServer()
              .setAddress(redisHost + ":" + redisPort)
              .setTimeout(redisTimeout);

      if (StringUtils.isNotBlank(redisPassword)) {
          serverConfig.setPassword(redisPassword);
      }

      return Redisson.create(config);
  }

}
//单机
RedissonClient redisson = Redisson.create();
Config config = new Config();
config.useSingleServer().setAddress("myredisserver:6379");
RedissonClient redisson = Redisson.create(config);


//主从

Config config = new Config();
config.useMasterSlaveServers()
  .setMasterAddress("127.0.0.1:6379")
  .addSlaveAddress("127.0.0.1:6389", "127.0.0.1:6332", "127.0.0.1:6419")
  .addSlaveAddress("127.0.0.1:6399");
RedissonClient redisson = Redisson.create(config);


//哨兵
Config config = new Config();
config.useSentinelServers()
  .setMasterName("mymaster")
  .addSentinelAddress("127.0.0.1:26389", "127.0.0.1:26379")
  .addSentinelAddress("127.0.0.1:26319");
RedissonClient redisson = Redisson.create(config);


//集群
Config config = new Config();
config.useClusterServers()
  .setScanInterval(2000) // cluster state scan interval in milliseconds
  .addNodeAddress("127.0.0.1:7000", "127.0.0.1:7001")
  .addNodeAddress("127.0.0.1:7002");
RedissonClient redisson = Redisson.create(config);
四、使用分布式锁
可重入锁
基于Redis的Redisson分布式可重入锁RLock对象实现了java.util.concurrent.locks.Lock接口。
  @RequestMapping("/redisson")
  public String testRedisson(){
      //获取分布式锁,只要锁的名字一样,就是同一把锁
      RLock lock = redissonClient.getLock("lock");

      //加锁(阻塞等待),默认过期时间是无限期
      lock.lock();
      try{
          //如果业务执行过长,Redisson会自动给锁续期
          Thread.sleep(1000);
          System.out.println("加锁成功,执行业务逻辑");
      } catch (InterruptedException e) {
          e.printStackTrace();
      } finally {
          //解锁,如果业务执行完成,就不会继续续期
          lock.unlock();
      }

      return "Hello Redisson!";
  }
如果拿到分布式锁的节点宕机,且这个锁正好处于锁住的状态时,会出现锁死的状态,为了避免这种情况的发生,锁都会设置一个过期时间。这样也存在一个问题,一个线程拿到了锁设置了30s超时,在30s后这个线程还没有执行完毕,锁超时释放了,就会导致问题,Redisson给出了自己的答案,就是 watch dog 自动延期机制。
Redisson提供了一个监控锁的看门狗,它的作用是在Redisson实例被关闭前,不断的延长锁的有效期,也就是说,如果一个拿到锁的线程一直没有完成逻辑,那么看门狗会帮助线程不断的延长锁超时时间,锁不会因为超时而被释放。
默认情况下,看门狗的续期时间是30s,也可以通过修改Config.lockWatchdogTimeout来另行指定。
另外Redisson 还提供了可以指定leaseTime参数的加锁方法来指定加锁的时间。超过这个时间后锁便自动解开了,不会延长锁的有效期。
在RedissonLock类的renewExpiration()方法中,会启动一个定时任务每隔30/3=10秒给锁续期。如果业务执行期间,应用挂了,那么不会自动续期,到过期时间之后,锁会自动释放。
  private void renewExpiration() {
      ExpirationEntry ee = EXPIRATION_RENEWAL_MAP.get(getEntryName());
      if (ee == null) {
          return;
      }

      Timeout task = commandExecutor.getConnectionManager().newTimeout(new TimerTask() {
          @Override
          public void run(Timeout timeout) throws Exception {
              ExpirationEntry ent = EXPIRATION_RENEWAL_MAP.get(getEntryName());
              if (ent == null) {
                  return;
              }
              Long threadId = ent.getFirstThreadId();
              if (threadId == null) {
                  return;
              }

              RFuture<Boolean> future = renewExpirationAsync(threadId);
              future.onComplete((res, e) -> {
                  if (e != null) {
                      log.error("Can't update lock " + getName() + " expiration", e);
                      return;
                  }

                  if (res) {
                      // reschedule itself
                      renewExpiration();
                  }
              });
          }
      }, internalLockLeaseTime / 3, TimeUnit.MILLISECONDS);
      ee.setTimeout(task);
  }
另外Redisson还提供了leaseTime的参数来指定加锁的时间。超过这个时间后锁便自动解开了。
// 加锁以后10秒钟自动解锁
// 无需调用unlock方法手动解锁
lock.lock(10, TimeUnit.SECONDS);

// 尝试加锁,最多等待100秒,上锁以后10秒自动解锁
boolean res = lock.tryLock(100, 10, TimeUnit.SECONDS);
如果指定了锁的超时时间,底层直接调用lua脚本,进行占锁。如果超过leaseTime,业务逻辑还没有执行完成,则直接释放锁,所以在指定leaseTime时,要让leaseTime大于业务执行时间。RedissonLock类的tryLockInnerAsync()方法
  <T> RFuture<T> tryLockInnerAsync(long waitTime, long leaseTime, TimeUnit unit, long threadId, RedisStrictCommand<T> command) {
      internalLockLeaseTime = unit.toMillis(leaseTime);

      return evalWriteAsync(getName(), LongCodec.INSTANCE, command,
              "if (redis.call('exists', KEYS[1]) == 0) then " +
                      "redis.call('hincrby', KEYS[1], ARGV[2], 1); " +
                      "redis.call('pexpire', KEYS[1], ARGV[1]); " +
                      "return nil; " +
                      "end; " +
                      "if (redis.call('hexists', KEYS[1], ARGV[2]) == 1) then " +
                      "redis.call('hincrby', KEYS[1], ARGV[2], 1); " +
                      "redis.call('pexpire', KEYS[1], ARGV[1]); " +
                      "return nil; " +
                      "end; " +
                      "return redis.call('pttl', KEYS[1]);",
              Collections.singletonList(getName()), internalLockLeaseTime, getLockName(threadId));
  }
读写锁
分布式可重入读写锁允许同时有多个读锁和一个写锁处于加锁状态。在读写锁中,读读共享、读写互斥、写写互斥。
RReadWriteLock rwlock = redisson.getReadWriteLock("anyRWLock");
// 最常见的使用方法
rwlock.readLock().lock();
// 或
rwlock.writeLock().lock();
读写锁测试类,当访问write接口时,read接口会被阻塞住。
@RestController
public class TestController {

  @Autowired
  RedissonClient redissonClient;

  @Autowired
  StringRedisTemplate redisTemplate;

  @RequestMapping("/write")
  public String write(){
      RReadWriteLock readWriteLock = redissonClient.getReadWriteLock("wr-lock");
      RLock writeLock = readWriteLock.writeLock();
      String s = UUID.randomUUID().toString();
      writeLock.lock();
      try {
          redisTemplate.opsForValue().set("wr-lock-key", s);
          Thread.sleep(10000);
      } catch (InterruptedException e) {
          e.printStackTrace();
      }finally {
          writeLock.unlock();
      }
      return s;
  }

  @RequestMapping("/read")
  public String read(){
      RReadWriteLock readWriteLock = redissonClient.getReadWriteLock("wr-lock");
      RLock readLock = readWriteLock.readLock();
      String s = "";
      readLock.lock();
      try {
          s = redisTemplate.opsForValue().get("wr-lock-key");
      } finally {
          readLock.unlock();
      }
      return s;
  }
}
信号量(Semaphore)
基于Redis的Redisson的分布式信号量(Semaphore)Java对象RSemaphore采用了与java.util.concurrent.Semaphore类似的接口和用法
关于信号量的使用你们能够想象一下这个场景,有三个停车位,当三个停车位满了后,其余车就不停了。能够把车位比做信号,如今有三个信号,停一次车,用掉一个信号,车离开就是释放一个信号。
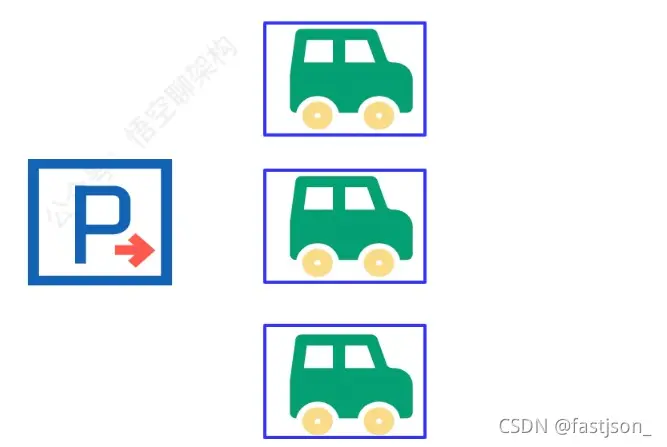
咱们用 Redisson 来演示上述停车位的场景。
先定义一个占用停车位的方法:
/**
* 停车,占用停车位
* 总共 3 个车位
*/
@ResponseBody
@RequestMapping("park")
public String park() throws InterruptedException {
// 获取信号量(停车场)
RSemaphore park = redisson.getSemaphore("park");
// 获取一个信号(停车位)
park.acquire();

return "OK";
}
再定义一个离开车位的方法:
/**
* 释放车位
* 总共 3 个车位
*/
@ResponseBody
@RequestMapping("leave")
public String leave() throws InterruptedException {
  // 获取信号量(停车场)
  RSemaphore park = redisson.getSemaphore("park");
  // 释放一个信号(停车位)
  park.release();

  return "OK";
}
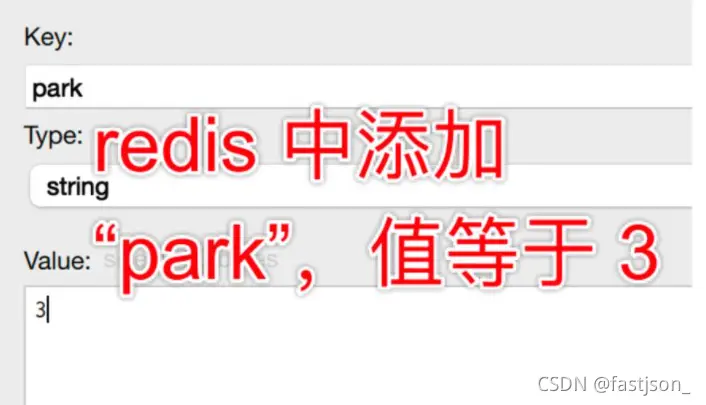
为了简便,我用 Redis 客户端添加了一个 key:“park”,值等于 3,表明信号量为 park,总共有三个值。
而后用 postman 发送 park 请求占用一个停车位。
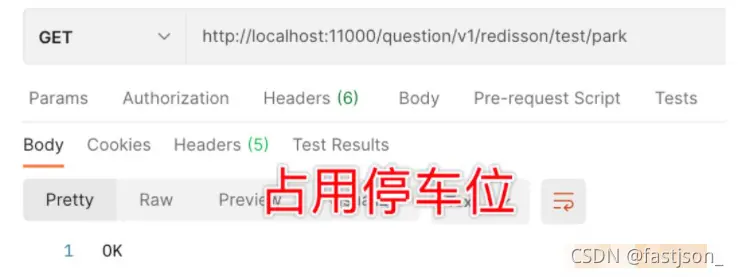
而后在 redis 客户端查看 park 的值,发现已经改成 2 了。继续调用两次,发现 park 的等于 0,当调用第四次的时候,会发现请求一直处于等待中,说明车位不够了。若是想要不阻塞,能够用 tryAcquire 或 tryAcquireAsync。
咱们再调用离开车位的方法,park 的值变为了 1,表明车位剩余 1 个。
注意:屡次执行释放信号量操做,剩余信号量会一直增长,而不是到 3 后就封顶了。
闭锁(CountDownLatch)
CountDownLatch作用:某一线程,等待其他线程执行完毕之后,自己再继续执行。
RCountDownLatch latch = redisson.getCountDownLatch("anyCountDownLatch");
latch.trySetCount(1);
latch.await();

// 在其他线程或其他JVM里
RCountDownLatch latch = redisson.getCountDownLatch("anyCountDownLatch");
latch.countDown();
在TestController中添加测试方法,访问close接口时,调用await()方法进入阻塞状态,直到有三次访问release接口时,close接口才会返回。
  @RequestMapping("/close")
  public String close() throws InterruptedException {
      RCountDownLatch close = redissonClient.getCountDownLatch("close");
      close.trySetCount(3);
      close.await();
      return "close";
  }

  @RequestMapping("/release")
  public String release(){
      RCountDownLatch close = redissonClient.getCountDownLatch("close");
      close.countDown();
      return "release";
  }
关于SpringBoot整合Redisson实现分布式锁的文章就介绍至此,更多相关SpringBoot Redisson分布式锁内容请搜索编程宝库以前的文章,希望大家多多支持编程宝库!