Maven私服一般安装Nexus。
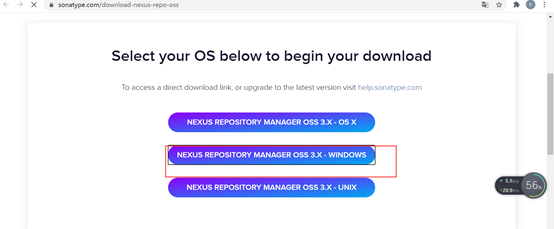
首先,Nexus下载,访问Nexus官方网址https://www.sonatype.com/download-nexus-repo-oss
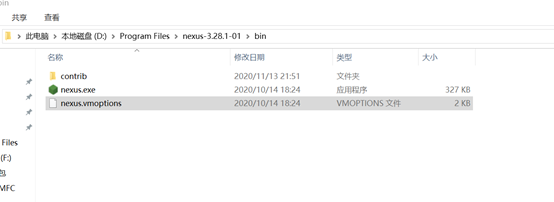
下载完成后是个压缩包

第二步 配置:
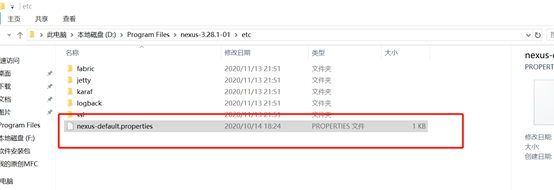
1)将上一步下载的nexus解压

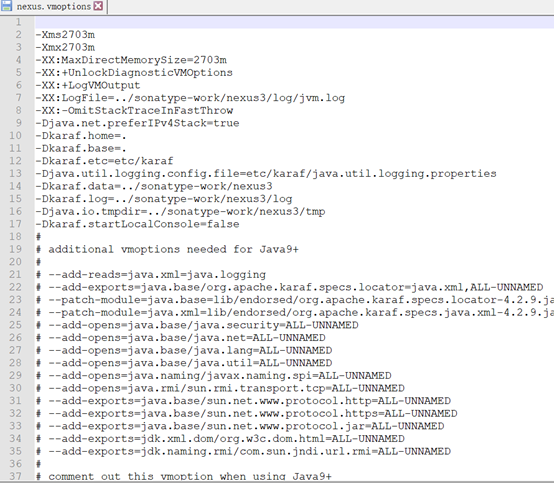
2)端口和监听配置
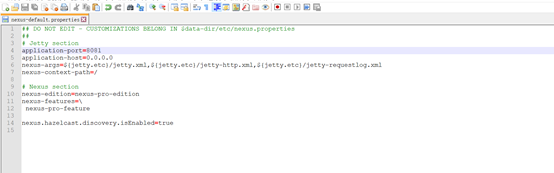
application-port:监听端口
application-host:监听主机
nexus-context-path:上下文路径
4) 运行环境配置
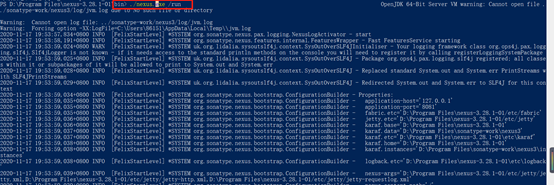
第三步安装:
方式一:以管理员身份运行cmd窗口 进入路径【D:\Program Files\nexus-3.28.1-01\bin】执行.\nexus.exe /run
方式二:使用本地服务的方式启动,
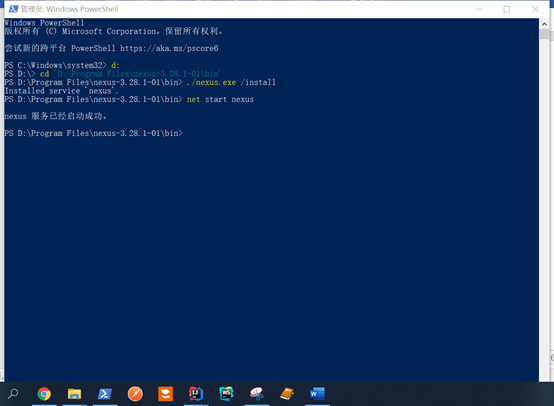
1) 安装服务:以管理方式打开cmd,进入路径【D:\Program Files\nexus-3.28.1-01\bin】,执行命令./nexus.exe /install
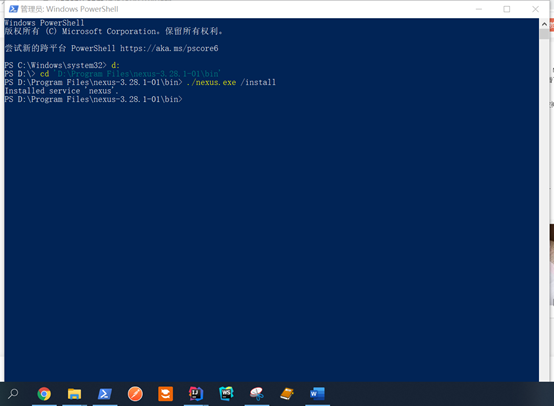
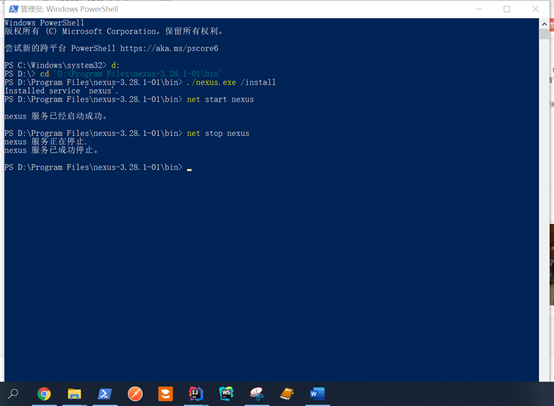
2) 启动服务:执行命令:net start nexus
注:
关闭服务:net stop nexus
卸载服务:./nexus.exe /uninstall
第四步启动、访问
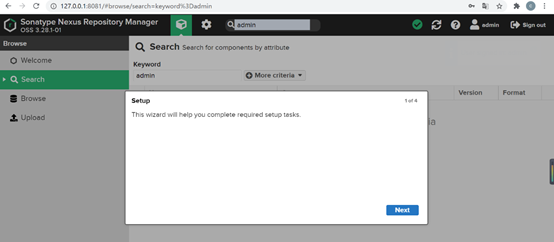
访问路径: http://127.0.0.1:8081/
用户名:admin
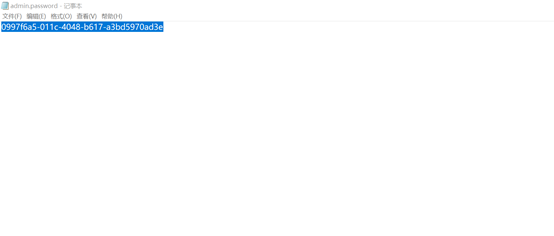
打开文件:D:\Program Files\sonatype-work\nexus3\admin.password
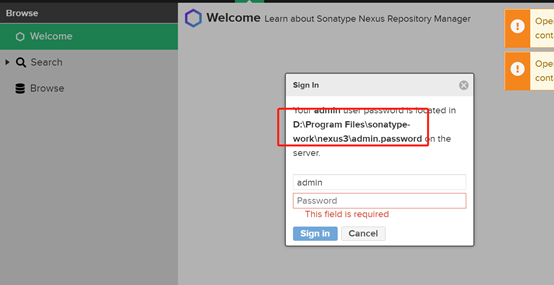
复制密码到密码输入框中
登陆成功后展示
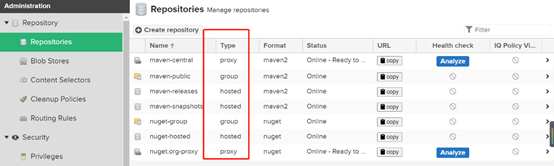
说明:
hosted:宿主仓库,主要存储本公司或团队开发的jar包
proxy:代理仓库,代理中央仓库和apache下测试版本的jar包
group:组仓库,将来连接组仓库。包含Hosted:宿主库,proxy:代理仓库
virtual:虚拟仓库,仓库废弃后会存存储到虚拟仓库
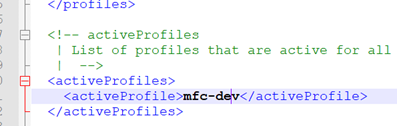
第五步 maven配置私服下载配置
打开文件【D:\Program Files\apache-maven-3.6.3\conf\settings】,

找到节点【profiles】在该节点在新建profile
在节点activeProfiles下加入
mfc-dev
来激活profile
测试
先去本地仓库把项目A依赖的项目B的jar删除,项目A报错,然后会从私服上下载,完成后检查是否下载成功。
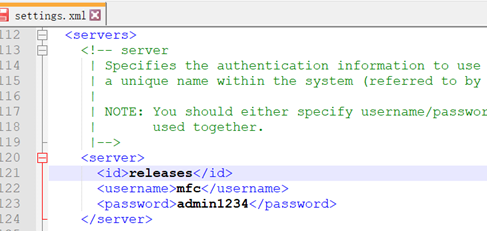
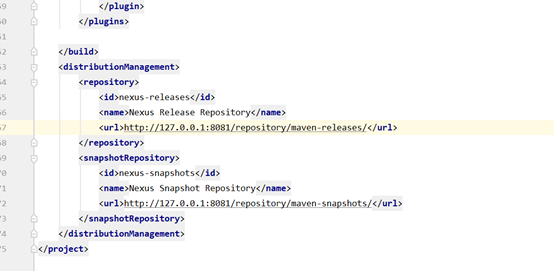
第六步maven上传jar到私服
打开文件【D:\Program Files\apache-maven-3.6.3\conf\settings】,

在【servers】下新增节点【server】如下
注意:settings.xml中server元素下id的值必须与POM中repository或snapshotRepository下id的值完全一致。将认证信息放到settings下而非POM中,是因为POM往往是它人可见的,而settings.xml是本地的。
在要上传的项目的pom文件中配置
点击【deploy】把应用打包并上传到私服
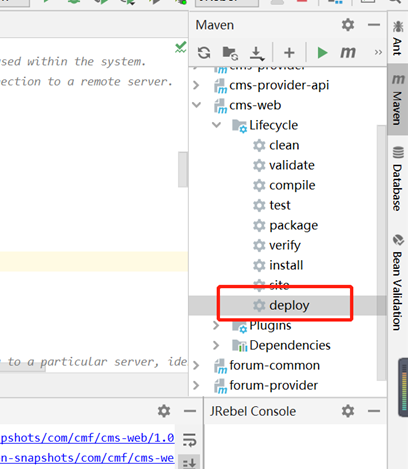
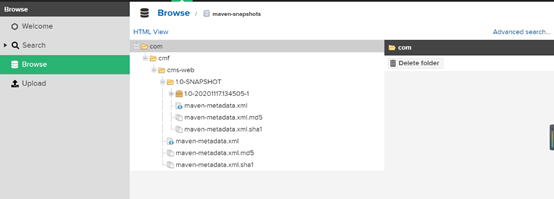
上传到私服完成查看私服: