@ConfigurationProperties + @Component 取值
1、使用 @ConfigurationProperties 注解,可以将 “application.yml” 配置文件中的键-值自动映射注入 Java Bean 中,Java bean 的属性必须提供 setter 方法才能注入值。
|
1)@ConfigurationProperties 可以标注在累=类、接口、枚举、注解、方法上 |
| 2)所在的类需要是 Spring 组件(@Component ),因为只有是容器中的组件,容器才会为 @ConfigurationProperties 提供此注入功能。 |
|
3)prefix 属性:用于将配置文件中指定的 key 下的所有属性与本类属性进行一一映射注入值,如果配置文件中不存在此 key,则不会为POJO注入值。如 prefix=”user”、prefix=”app.user” 。 |
|
4)ignoreInvalidFields 属性:是否忽略无效的字段,默认为 false 表示不忽略。配置的属性值类型错误,无法强转的字段就是无效字段,比如 java bean 的属性类型是 Date,而 application.yml 中配置的值是 2020/12/35,则显然无法转为 Date 类型,此时如果此属性为 false,则启动报错,无法正常启动应用,为 true 时则会忽略注入。 |
| 5)如果配置文件中没有为 java bean 配置相应的属性值,则不会注入值,java bean 属性仍然使用自己的默认值,不会影响程序启动。 |
2、如下演示通过 yml 文件为 java bean 对象属性注入值,User 对象中关联 Dog 对象,先提供 java bean 如下,基本涵盖了 YAML 各种语法:
-
import org.springframework.boot.context.properties.ConfigurationProperties;
-
import org.springframework.stereotype.Component;
-
import java.util.Date;
-
import java.util.List;
-
import java.util.Map;
-
-
/**
-
* @author wangMaoXiong
-
* Created by Administrator on 2018/7/11 0011.
-
* <p>
-
* 用户···实体
-
* @ConfigurationProperties 表示 告诉 Spring Boot 将本类中的所有属性和配置文件中相关的配置进行绑定;
-
* prefix = “user” 表示 将配置文件中 key 为 user 的下面所有的属性与本类属性进行一一映射注入值,如果配置文件中
-
* 不存在 “user” 的key,则不会为 POJO 注入值,属性值仍然为默认值
-
* <p/>
-
* @ConfigurationProperties (prefix = ” user “) 默认从全局配置文件中获取值然后进行注入
-
* @Component 将本类标识为一个Spring 组件,因为只有是容器中的组件,容器才会为 @ConfigurationProperties 提供此注入功能
-
*/
-
@Component
-
@ConfigurationProperties(prefix = “user”)
-
public class UserProperties {
-
private Integer id;
-
/**
-
* 如果 lastName 属性名称改为“name”时,注入的时候会强制变成计算机名称,而导致自己的值无法注入(原因未知)
-
*/
-
private String lastName;
-
private Integer age = 18;
-
private Date birthday;
-
private List<String> colorList;
-
private Map<String, String> cityMap;
-
/**
-
* 关联的 Dog 对象可以不加 @ConfigurationProperties 也会自动注入
-
*/
-
private Dog dog;
-
-
//省略了 getter、setter 方法未粘贴
-
}
完整源码:UserProperties.java 、Dog.java
3、java bean 上写了 “@ConfigurationProperties(prefix = “user”)” 注解后,如果提示 “Spring Boot配置文件注解处理器没有找到”,这时可以点击右上角的提示 “Opne Documention…”,进入官方文档拷贝依赖放入到 “pom.xml” 文件中即可。如下所示,它的作用是在写 yaml 文件时就会有提示了,会方便很多(当然没导入此依赖也不影响运行)。
-
<!–导入配置文件处理器,配置文件属性值与Java Bean进行绑定时就会有提示–>
-
<dependency>
-
<groupId>org.springframework.boot</groupId>
-
<artifactId>spring-boot-configuration-processor</artifactId>
-
<optional>true</optional>
-
</dependency>
4、application. yml 文件配置如下,key 值 user 要与 User 实体类上的 “@ConfigurationProperties(prefix = “user”)” 对应,
配置文件中 user 下的 key 名称要与实体类 User 中的属性一致才能注入(下面基本涵盖了 YAML 所有的数据类型)。
-
-
user:
-
id: 1200
-
lastName: 杨戬
-
-
birthday: 2018/07/11
-
colorList:
-
– red
-
– yellow
-
– green
-
cityMap: {mapK1: mapV1,mapK2: mapV2}
-
-
dog:
-
id: 9527
-
name: 哮天犬
-
age: 100
在线源码:https://gitee.com/wangmx1993/wmx-redis/blob/master/src/main/resources/application.yml
5、取值的时候注意:不能直接 new User() 对象取值,此时是没有注入的配置值的,可以使用 @Resource、@Autowired 注入 User 对象获取注入的配置值。
-
import org.springframework.web.bind.annotation.GetMapping;
-
import org.springframework.web.bind.annotation.RestController;
-
import javax.annotation.Resource;
-
/**
-
* ConfigurationProperties 为 java bean 注入属性值
-
*
-
* @author wangMaoXiong
-
* @version 1.0
-
* @date 2020/9/25 9:18
-
*/
-
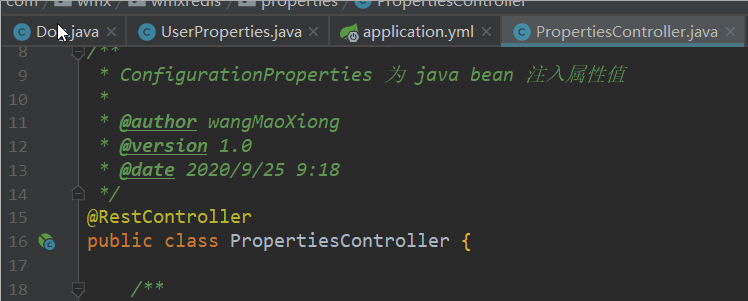
@RestController
-
public class PropertiesController {
-
/**
-
* 从容器中获取实例
-
*/
-
@Resource
-
private UserProperties userProperties;
-
/**
-
* http://localhost:8080/redisson/properties/getDefaultUser
-
*
-
* @return
-
*/
-
@GetMapping(“properties/getDefaultUser”)
-
public UserProperties getDefaultUser() {
-
return userProperties;
-
}
-
}
在线源码:PropertiesController.java
@ConfigurationProperties + @Bean 取值
1、@ConfigurationProperties + @Component 的方式是直接将 java bean 标识为 Spring 组件,有的时候可能目标 java bean 只是纯粹的 java bean,并没有注解标识。此时可以使用 @Configuration + @Bean 组合将目标 java bean 添加到 Spring 容器中的同时,然后用 @ConfigurationProperties 为实例注入配置。
2、这也是 Spring boot 官方 org.springframework.boot.autoconfigure 包下各种 XxxAutoConfiguration 自动配置中常用的方式。
3、下面演示 @ConfigurationProperties 标识在方法上,使用 @ConfigurationProperties + @Bean 为一个原始的 java bean 注值。
一:提供 Java bean:PersonProperties 对象关联 Dog,都是普通的 java 对象。
-
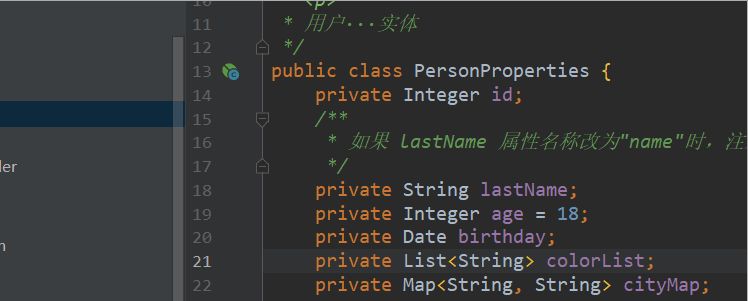
public class PersonProperties {
-
private Integer id;
-
/**
-
* 如果 lastName 属性名称改为“name”时,注入的时候会强制变成计算机名称,而导致自己的值无法注入(原因未知)
-
*/
-
private String lastName;
-
private Integer age = 18;
-
private Date birthday;
-
private List<String> colorList;
-
private Map<String, String> cityMap;
-
/**
-
* 关联的 Dog 对象
-
*/
-
private Dog dog;
-
//省略 getter 、setter 方法
-
}
二:提供全局文件配置:在线源码 application.yml
-
-
person:
-
id: 1301
-
lastName: 二郎神
-
-
birthday: 2018/07/11
-
colorList:
-
– RED
-
– yellow
-
– GREEN
-
cityMap: {mapK1: 长沙,mapK2: 深圳}
-
-
dog:
-
id: 9528
-
name: 哮天犬
-
age: 1088
三:提供配置类为实例注入属性:在线源码:PropertiesConfig.java
-
import org.springframework.boot.context.properties.ConfigurationProperties;
-
import org.springframework.context.annotation.Bean;
-
import org.springframework.context.annotation.Configuration;
-
/**
-
* 配置类
-
*
-
* @author wangMaoXiong
-
* @version 1.0
-
* @date 2020/9/25 10:11
-
*/
-
@Configuration
-
public class PropertiesConfig {
-
/**
-
* Bean :将对象实例交由 Spring 容器管理
-
* ConfigurationProperties :为实例注入配置
-
* 组合起来的效果就是:这个交由 Spring 容器管理的 PersonProperties 实例,自身被注入了全局配置文件中的配置值,
-
* 然后可以在其他地方获取 PersonProperties 并使用
-
*
-
* @return
-
*/
-
@ConfigurationProperties(prefix = “person”)
-
@Bean
-
public PersonProperties personProperties() {
-
return new PersonProperties();
-
}
-
}
四:取值测试:在线源码 PropertiesController.java
-
import org.springframework.web.bind.annotation.GetMapping;
-
import org.springframework.web.bind.annotation.RestController;
-
import javax.annotation.Resource;
-
/**
-
* ConfigurationProperties 为 java bean 注入属性值
-
*
-
* @author wangMaoXiong
-
* @version 1.0
-
* @date 2020/9/25 9:18
-
*/
-
@RestController
-
public class PropertiesController {
-
@Resource
-
private PersonProperties personProperties;
-
/**
-
* ConfigurationProperties + Bean 取值演示
-
* <p>
-
* http://localhost:8080/properties/getDefaultPerson
-
*
-
* @return
-
*/
-
@GetMapping(“properties/getDefaultPerson”)
-
public PersonProperties getDefaultPerson() {
-
return personProperties;
-
}
-
}
@ConfigurationProperties + @EnableConfigurationProperties 取值
1、使用场景:目标 Java bean 上配置了 @ConfigurationProperties 注解,但是并没有 @Component 注解,然后在 @Configuration 配置类中使用 @EnableConfigurationProperties 注解启用对 @ConfigurationProperties 注解的 bean 的支持,即将目标 java bean 添加到 Spring 容器中管理。
2、对比三种方式不难发现,不管是 @Component 或者 @Bean 还是 @EnableConfigurationProperties,@ConfigurationProperties 注入配置的前提是目标 java bean 必须交由 Spring 容器管理。
3、此种方式是 Spring boot 官方 org.springframework.boot.autoconfigure 包下各种 XxxAutoConfiguration 自动配置中最常用的方式,基本上随便打开一个都能看到,比如:KafkaAutoConfiguration、MongoDataAutoConfiguration、RedisAutoConfiguration 等等。
4、下面进行演示模仿 Spring boot 官方的此种方式。
一:提供 java bean :在线源码:StaffProperties.java
-
import org.springframework.boot.context.properties.ConfigurationProperties;
-
import java.util.Date;
-
import java.util.List;
-
import java.util.Map;
-
-
@ConfigurationProperties(prefix = “staff”)
-
public class StaffProperties {
-
private Integer id;
-
/**
-
* 如果 lastName 属性名称改为“name”时,注入的时候会强制变成计算机名称,而导致自己的值无法注入(原因未知)
-
*/
-
private String lastName;
-
private Integer age = 18;
-
private Date birthday;
-
private List<String> colorList;
-
private Map<String, String> cityMap;
-
/**
-
* 关联的 Dog 对象
-
*/
-
private Dog dog;
-
//省略 getter、setter 方法未粘贴
-
}
二:提供全局文件配置:在线源码 https://gitee.com/wangmx1993/wmx-redis/blob/master/src/main/resources/application.yml
-
-
staff:
-
id: 2305
-
lastName: 二郎真君
-
-
birthday: 1918/07/11
-
colorList:
-
– RED
-
– YELLOW
-
– GREEN
-
cityMap: {mapK1: 长沙麓谷,mapK2: 深圳科技园}
-
-
dog:
-
id: 952823
-
name: 哮天犬
-
age: 1088121
三:配置类:在线源码 StaffConfig.java
-
import org.springframework.boot.context.properties.EnableConfigurationProperties;
-
import org.springframework.context.annotation.Configuration;
-
/**
-
* 配置类
-
* EnableConfigurationProperties:将目标 java bean 配置类(ConfigurationProperties) 交由 Spring 容器管理
-
* 而后可以在任意地方使用 取值使用.
-
*
-
*/
-
@Configuration
-
@EnableConfigurationProperties(StaffProperties.class)
-
public class StaffConfig {
-
/**
-
* 可以参考官方的 KafkaAutoConfiguration 就知道,如果想在配置类中直接获取目标 java bean 属性配置类,
-
* 则直接通过构造器传入即可,通常用于为创建其他 bean 时提供属性配置。这里不再继续深入,实际中参考官网一目了然。
-
*/
-
private final StaffProperties properties;
-
-
/**
-
* 应用启动的时候会自动执行本来,完成赋值。
-
*
-
* @param properties
-
*/
-
public StaffConfig(StaffProperties properties) {
-
this.properties = properties;
-
System.out.println(“properties=” + this.properties);
-
}
-
}
四:取值测试:在线源码 PropertiesController.java
@Value 取值注入
1、@Value 与 @ConfigurationProperties 注解都可以从全局配置文件中获取值然后注入到属性中。
2、以前在 Spring 核心配置文件 beans.xml 中用如下配置为某个类的属性注入值。
-
<!–以前在Spring核心配置文件beans.xml用如下配置为某个类的属性注入值–>
-
<bean id=“dataSource” class=“org.springframework.jdbc.datasource.DriverManagerDataSource”>
-
<property name=“driverClassName” value=“${jdbc.driverclass}”></property>
-
<property name=“url” value=“${jdbc.url}”></property>
-
<property name=“username” value=“root”></property>
-
<property name=“password” value=“123456”></property>
-
</bean>
3、现在直接使用 @Value (xxx) 注解就可以直接为某个属性注入全局配置文件中的值,完全等价于上面。
| @Value(“#{}”):表示 SpEl 表达式。 @Value(“${xxx}”):表示从配置文件中取值,如果 “xxx” key 不存在,则启动时报错:Injection of autowired dependencies failed @Value(“${xxx:yyy}”):从配置文件中取值,如果 “xxx” key 不存在,则使用默认值 “yyy”,否则启动会报错。 |
4、假如有 application.yml 文件如下:
-
server:
-
port: 8081
-
user:
-
id: 110
-
lastName: 张三
-
age: 110
-
birthday: 2018/07/11
-
colorList:
-
– red
-
– yellow
-
– green
-
cityMap: {mapK1: mapV1,mapK2: mapV2}
-
dog:
-
id: 9527
-
name: 哮天犬
-
age: 100
-
5、@Value 获取全局配置文件 application.yml 中的值为属性赋值(被赋值的属性可以不提供 setter 方法,但是所在的类必须被 Spring 容器管理):
-
import org.springframework.beans.factory.annotation.Value;
-
import org.springframework.stereotype.Component;
-
/**
-
* Created by Administrator on 2018/7/11 0011.
-
* 狗 实体类
-
* @Component 无论是@ConfigurationProperties还是@Value注入值,都必须先使当前类成为-
-
* Spring容器中的组件,这样Spring容器才能为它DI注入值
-
*/
-
@Component
-
public class Dog {
-
//赋值普通的Java数据类型值
-
@Value(“1000”)
-
private Integer id;
-
-
//${key}:从环境变量以及配置文件中获取值,如果 user.lastName 不存在,则设置默认值 root
-
@Value(“${user.lastName:root}”)
-
private String name;
-
-
//#{SpEL}:Sping 表达式语言
-
@Value(“#{10*3}”)
-
private Integer age;
-
}
@Value VS @ConfigurationProperties
| 对比项 | @ConfigurationProperties | @Value |
| 注解功能 | 将配置文件中的属性值批量注入类的各个属性 | 为类中的各个属性逐个赋值 |
| 松散绑定 | 支持 | 不支持 |
| SpEL(Spring 表达式) | 不支持 | 支持 |
| JSR303数据校验 | 支持 | 不支持 |
| 复杂类型封装 | 支持 | 不支持 |
| 属性是否需要提供setter方法 | 需要 | 不需要 |
1、两者都可以从配置文件 *.yml 与 *.properties 中获取到值;
2、如果项目中只是在某个业务逻辑中需要获取一下配置文件中的某项值,使用 @Value 即可;如果项目中专门编写了一个 JavaBean 来和配置文件进行映射,则直接使用 @ConfigurationProperties 即可;
3、Spring Boot 官方 org.springframework.boot.autoconfigure 包下的 XxxProperties 类都是使用 @ConfigurationProperties 注入属性值的,如:

配置文件 ${xxx} 占位符
1、Spring Boot 全局配置文件“application.yml”与”application.properties” 可以使用 ${random} 来设置随机值
2、常用随机设值如下:
| ${random.value}————随机生成一个32位的字符串,如:b21d56d2f10d74f84608dfff01b25552 ${random.int}—————随机生成一个int范围的随机数,如:-386223791 ${random.long}————-随机生成一个long范围的随机数,如:2404587442488649534 ${random.int(10)}———-随机生一个[0,10]之间的随机数,如:8 ${random.int[1024,65536]}——-随机生成一个[1024,65536]之间的随机数,如:63856 ${user.userName}————获取配置文件中已经配置好的属性值,不存在时直接返回整个“${user.userName}” ${user.width:hello}———–获取配置文件中已经配置好的属性值,不存在时则用”hello”返回 |
3、如下所示配置参数,然后可以使用 @ConfigurationProperties 、@Value 注解取值:
-
user.id=${random.int}
-
user.age=${random.long}
-
user.userName=张三_${random.uuid}
-
user.addr=深圳_${random.value}
-
user.city=长沙_${random.int(10)}
-
user.like=电影_${random.int[1024,65536]}
-
user.color=红色_${user.userName}
-
user.height=${user.width:hello}_身高转自:https://blog.csdn.net/wangmx1993328/article/details/80998758