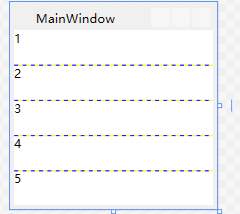
假设我们有以下布局

<Grid x:Name=”Grid” ShowGridLines=”True”> <Grid.RowDefinitions> <RowDefinition /> <RowDefinition /> <RowDefinition /> <RowDefinition /> <RowDefinition /> </Grid.RowDefinitions> <TextBlock x:Name=”One” Grid.Row=”0″ Text=”1″ /> <TextBlock x:Name=”Two” Grid.Row=”1″ Text=”2″ /> <TextBlock x:Name=”Three” Grid.Row=”2″ Text=”3″ /> <TextBlock x:Name=”Four” Grid.Row=”3″ Text=”4″ /> <TextBlock x:Name=”Five” Grid.Row=”4″ Text=”5″ /> </Grid>

展示出来的界面是这样子的

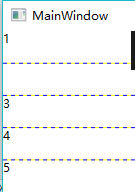
我们尝试把2这一列删除~

Grid.Children.Remove(Two);

删除是删除了,但第二列还是占了位置啊!

于是我们尝试以下操作

Grid.RowDefinitions.Remove()

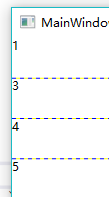
这样的操作仅仅是删除了最后一行,5这个Textbox只能向上靠拢。

因此我们在删除之后,需要重新指定一下新位置

private void ReSetIndex(){ var row = 0; foreach (var borderGridChild in BorderGrid.Children){ (borderGridChild as UIElement)?.SetValue(Grid.RowProperty, row++); } }

这样就正常了,但 Grid.RowDefinitions.Remove()这里怎么也得指定一下位置吧?

var row = Grid.RowDefinitions[int.Parse(Two.GetValue(Grid.RowProperty).ToString())];

private void Remove() { var row = Grid.RowDefinitions[int.Parse(Two.GetValue(Grid.RowProperty).ToString())]; Grid.Children.Remove(Two); Grid.RowDefinitions.Remove(row); ReSetIndex(); } private void ReSetIndex() { var row = 0; foreach (var borderGridChild in Grid.Children) { (borderGridChild as UIElement)?.SetValue(Grid.RowProperty, row++); } }


本文作者:樱花落舞
本文链接:https://www.cnblogs.com/yinghualuowu/p/9789491.html
关于博主:这里是个萌新
版权声明:本博客所有文章除特别声明外,均采用 BY-NC-SA 许可协议。转载请注明出处!